How to Install Slime Tire Sealant
You’ve reached for the bottle to fix or prevent flat tires – smart choice! Whether this is an emergency repair (yellow label bottle), or you are preventing flats for up to 2 years (red, blue or black label bottle), the Slime installation process is the same.
Slime tire sealant is easy to install, cleans up with water and will get you back on the road quickly. All you need is the bottle and a tire inflator. Let’s get started:
Step 1: Position the Tire
Slime can be inserted with the valve stem located in any position, but it works best if you position the valve stem so it sits in the upper half of the tire.

Step 2: Remove the Valve Core
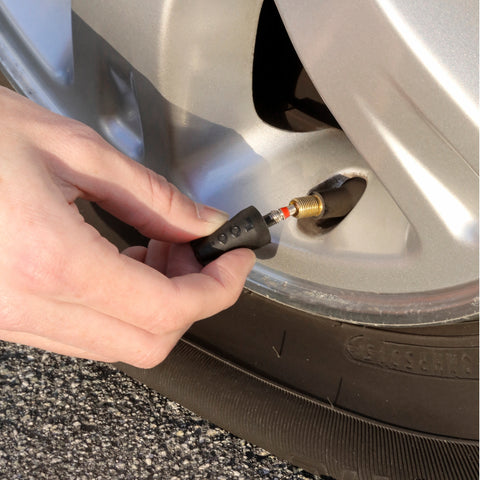
Take the valve cap off your valve stem. When you look inside the top of the tire valve stem, you will see a metal cylinder in the very center. This is the valve core and it needs to be removed in order to install Slime.
The black cap on your bottle of Slime is a valve core removal tool. Twist it off the bottle and use the knobby tool in the center to engage the valve core. Slowly twist the tool counter-clockwise to remove your valve core. You will know you are successfully removing the valve core when air starts hissing out of your tire.
 |
 |
Step 3: Deflate Your Tire
Your tire must be as flat as possible to inject the Slime. Allow the air to slowly escape from the tire and set aside the valve core (you will need this piece again later).
Step 4: Remove the Puncturing Object
Locate the screw, nail or other offending object that caused your tire to go flat. If possible, remove it from the tire.

Step 5: Inject Slime
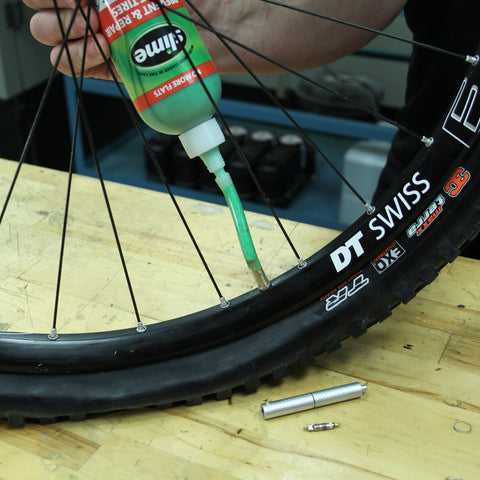
Unscrew the white cap from the top of the bottle, peel off the white seal and then re-attach the white cap. Remove the clear tube from side of the bottle and attach one side to the top of the white bottle cap. Attach the other side to the valve stem on your tire.

Squeeze in the appropriate amount of Slime. You can use the chart on the back of your bottle to determine how much Slime you need, or you can use our Slime calculator. If you are using the gallon product of Slime, then one pump equals approximately 1 oz of Slime.
 |
 |
If your tire has tubes (like on a bicycle or dirt bike), you can inject the sealant directly into the tube before inserting the tube into the wheel, or you can inject the sealant into a tube that is already pre-installed into the wheel.
 |
 |
Step 6: Reinstall the Valve Core
Remember that little valve core you removed in Step 2? Time to put it back in! Using the same black tool from the cap of the bottle, screw the valve core back into the valve stem by turning clockwise until tight. If any Slime has oozed out while installing the valve core, simply wipe away with a cloth.

Step 7: Add Air
Using your favorite tire inflator, air up the tire to the manufacturer’s recommended air pressure. You can find this measurement on a label typically located on the inside door jamb of the driver or passenger seat.

Step 8: Rotate the Tire
To properly spread the sealant around the inside of your tire, drive approximately 0.2 miles, then stop and verify that the sealant plugged your puncture and that the tire is holding air pressure. If you are installing Slime in a bicycle, simply spin the tire to evenly distribute the sealant.
Congratulations! You have successfully installed Slime and repaired your flat tire.
If you installed the yellow label Emergency Tire Sealant formula, then please seek a professional repair within 3 days or 100 miles.
